Example Home Elevator Projects in Auburn, Washington

Seven example jobs, from the first visit to the first ride, each with its house, building work, timeline and cost.

Elevator sized for a wheelchair in a new two-story house

Example project
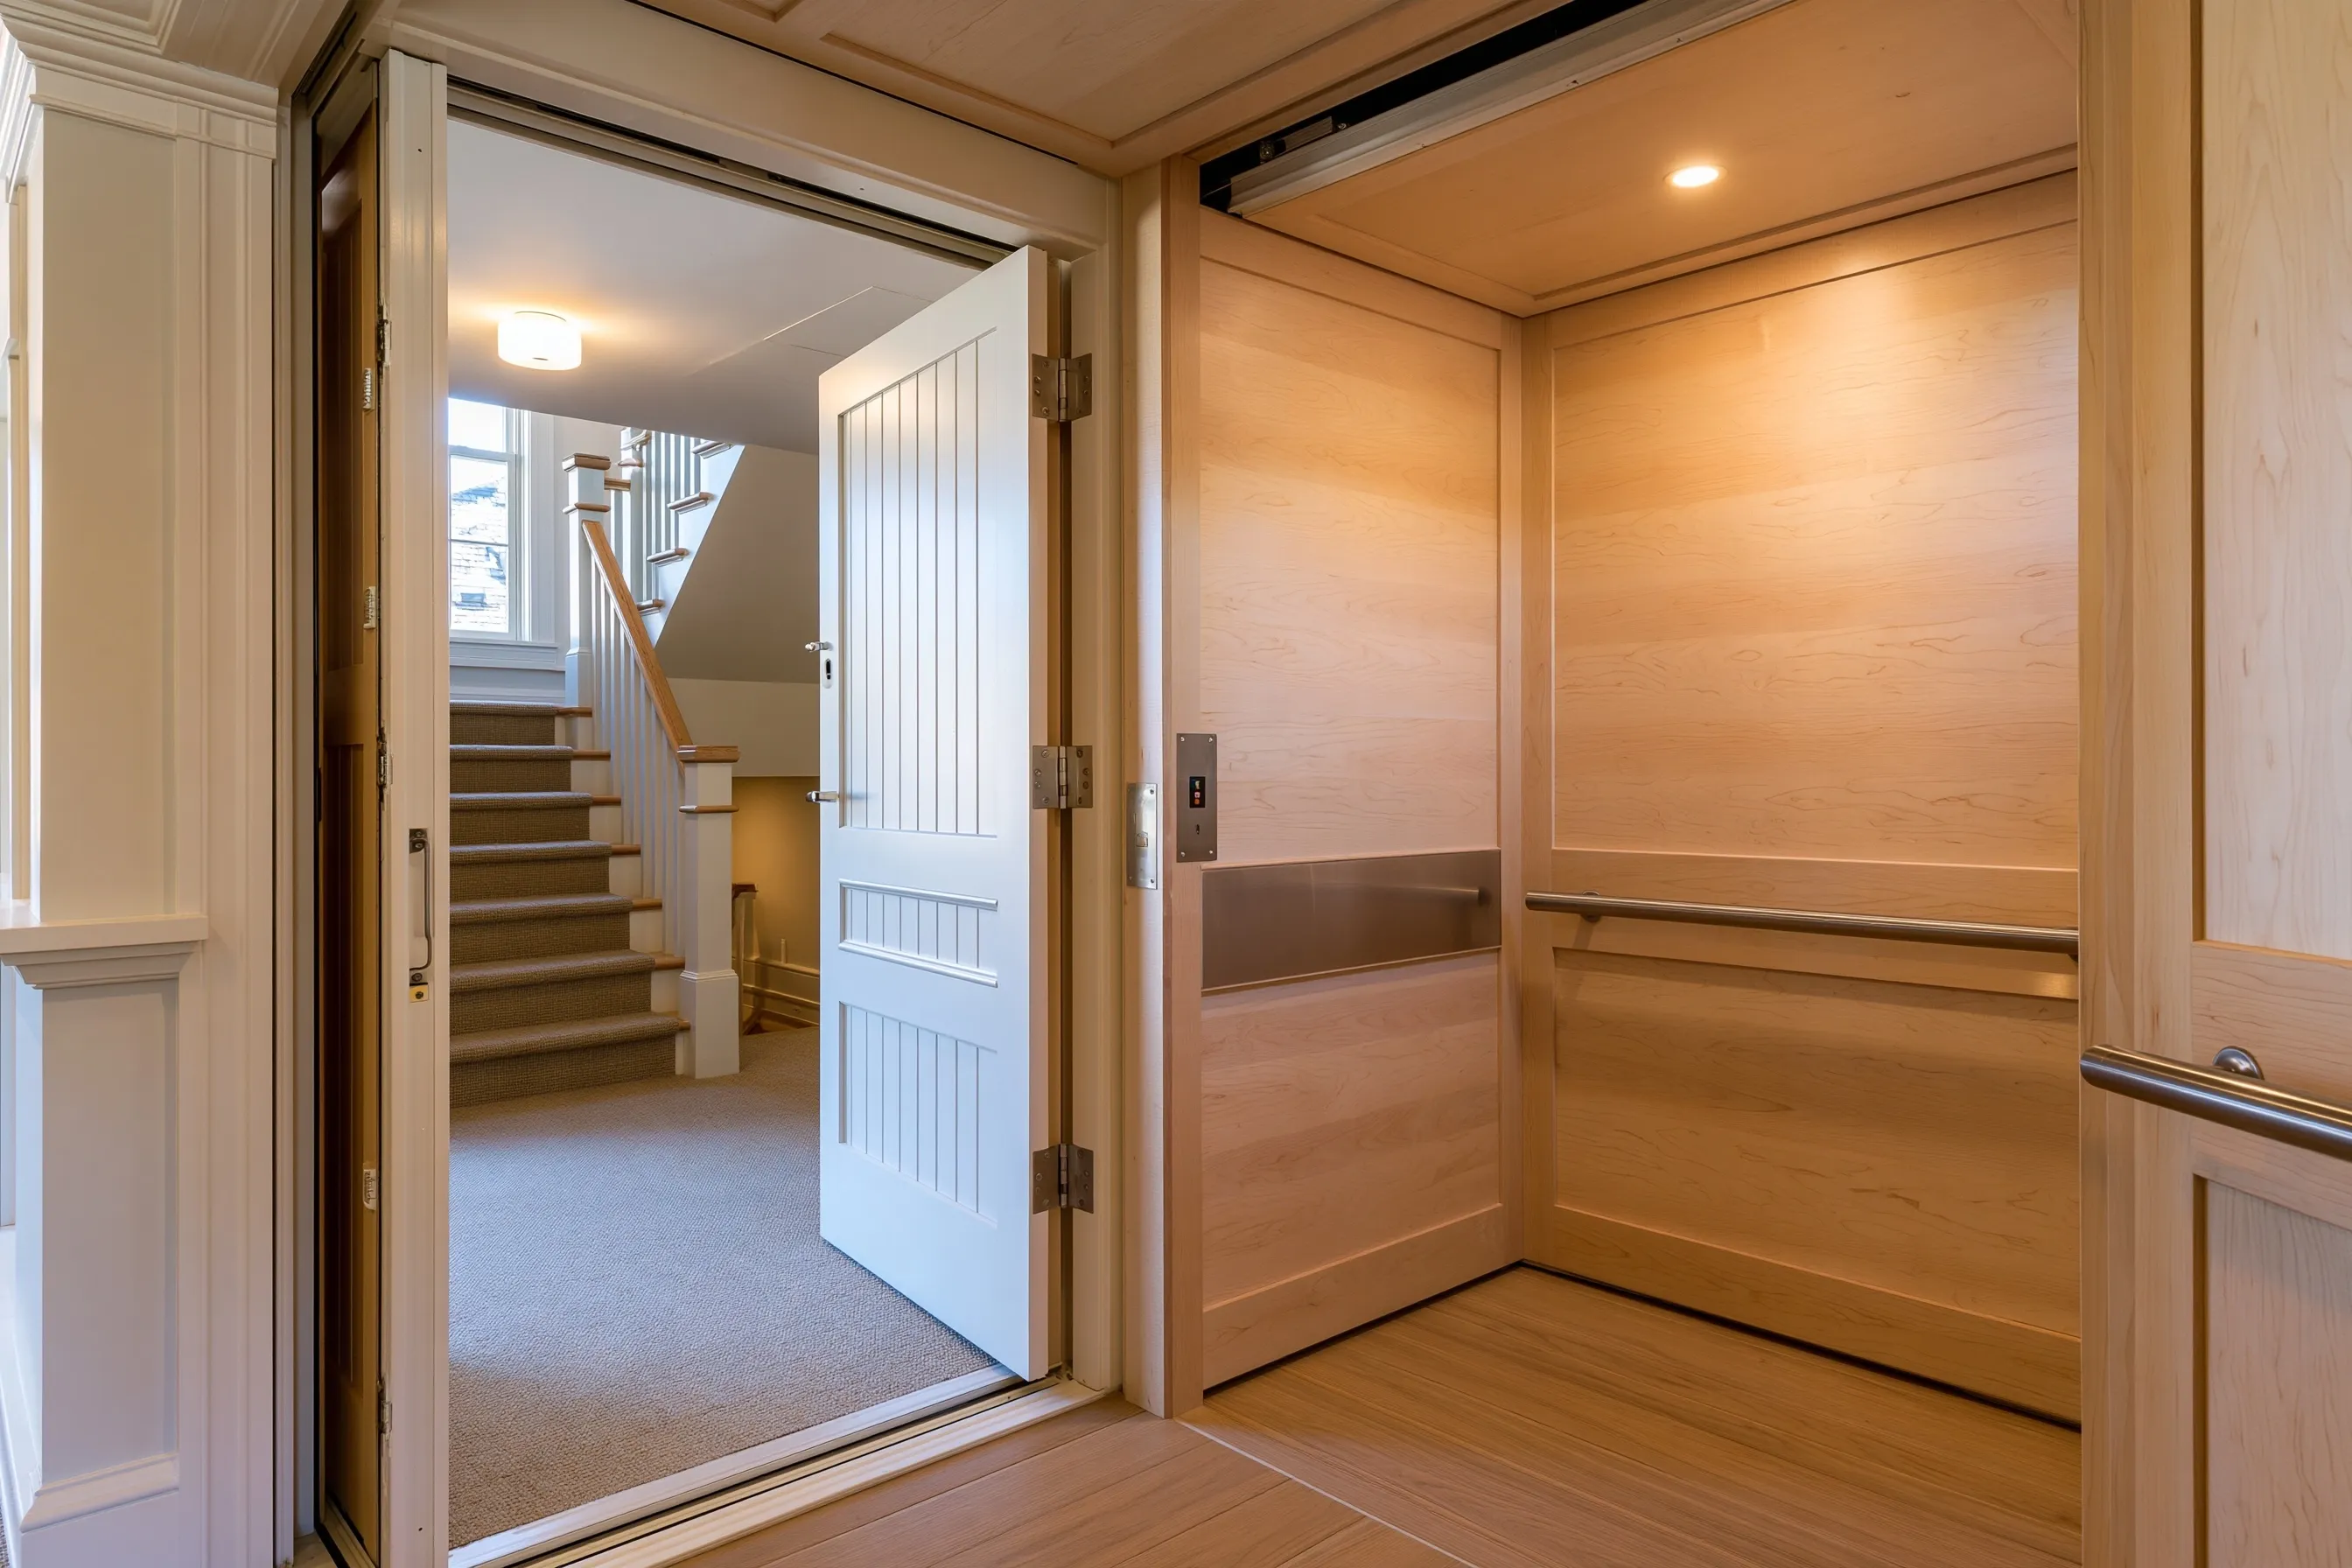
Open residential elevator cab with light wood wall panels and a metal handrail, looking out to a carpeted hall and stair
Home
New Auburn build with two stories and about 2,800 sq ft
Original request
An elevator a wheelchair user can ride alone, built in with the house
Stops
Two, the main floor and the upstairs hall
Cab
Standard residential cab with room for one wheelchair, a handrail and wood panels
Doors
An automatic opener on the door at each floor
Timeline
Shaft and pit planned before framing; elevator installed in one to two weeks near the end of the build
Estimated elevator cost
$47,000

Scope of work

The elevator set in the shaft the builder frames: cab, rails, drive, a door with an automatic opener at both floors, controls, hookup, testing and the state elevator permit and inspection. The shaft, pit and power run are in the builder’s contract.

Project overview

In this example, a family building a two-story house in Auburn has a teenage son who uses a wheelchair. They want him to reach his room and the main floor without help, so the elevator is drawn into the house plans from the start.

The cab and door widths are checked against his own chair before the shaft is framed. Each floor gets a door with an automatic opener, and the call buttons sit at a height he can reach from the chair.

The goal

A house where a wheelchair user can get to every room on his own from the day the family moves in.

Process

  1. Design stage Elevator model picked, chair measured, and the shaft, pit and power shown on the house plans.
  2. Permit Elevator permit filed with Washington L&I, which can take about 30 business days to answer.
  3. Framing The builder frames the shaft to the elevator drawings and runs the power.
  4. Near the end Elevator installed in one to two weeks, then the state inspection.
  5. Move-in Controls, the door openers and the power-loss procedure shown to the family.

Planning right

  • Bring the wheelchair to the design meeting. Its turning room decides where the doors go.
  • The clear inside size of the cab is what counts, not the outside size of the shaft.
  • Put the call buttons and the phone in the cab where a seated rider can reach them.
  • Plan the elevator before framing. Fixing a framed shaft costs far more than drawing it right.
Get a free quoteMore about elevators for new homes

Through-floor lift from the living room to the upstairs hall

Example project

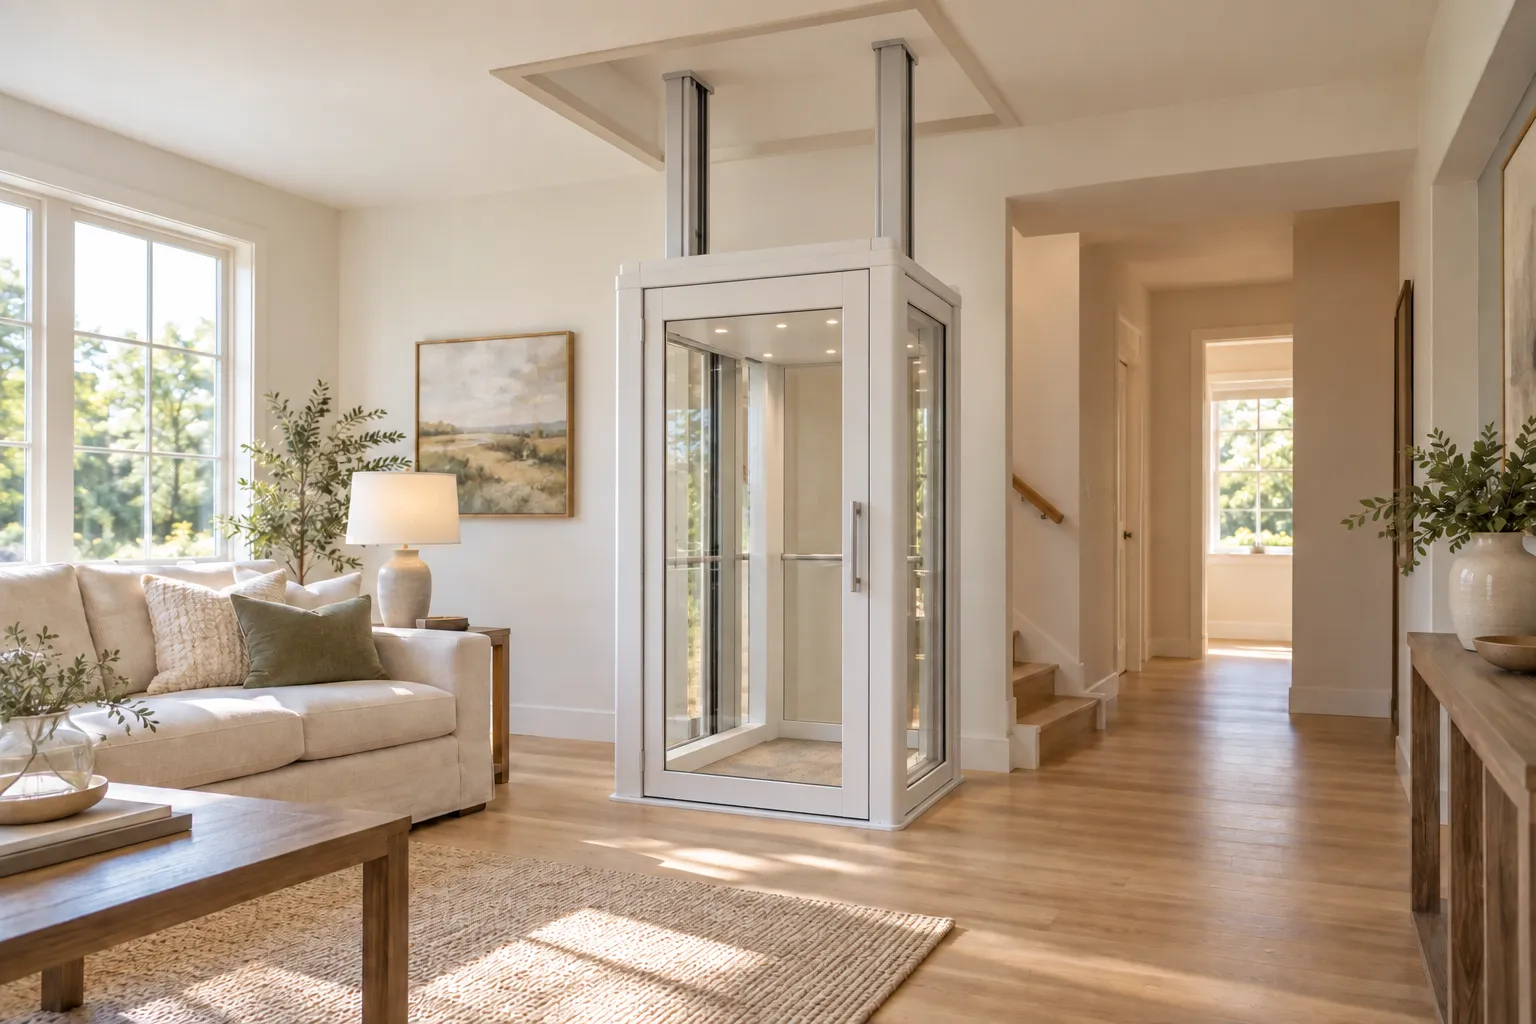
White-framed through-floor home lift with glass sides in a bright living room, its rails rising to a framed ceiling opening
Home
Auburn two-story from the 1990s, living room with tall windows, about 1,900 sq ft
Original request
A way upstairs for one owner whose knees make the stairs hard
Lift
Through-floor lift for one standing rider, two floors
Spot
A corner of the living room, rising through the ceiling into the upstairs hall
Building work
One floor opening cut and framed, a power circuit, trim at both floors
Timeline
A few days of work at the house once the lift arrives
Cost
$33,000

Scope of work

The lift, a floor opening cut and framed between the living room and the upstairs hall, a power circuit for the lift, trim and paint touch-up at both floors, testing and the state elevator permit and inspection.

Project overview

In this example, one owner of a 1990s house in Auburn finds the stairs harder each year, and the bedrooms are upstairs. There are no closets that line up between the floors, so building a shaft would mean giving up a room.

A through-floor lift needs no shaft. It rides on two rails in a living room corner and passes through a framed opening into the upstairs hall. When the cab is upstairs, the floor below it is clear again.

The goal

An easy ride to the bedrooms without giving up a room for a shaft.

Process

  1. First visit Both floors measured, the joists checked above the chosen corner, and the route on each floor walked.
  2. Permit Elevator permit filed with Washington L&I.
  3. Day one Floor opening cut and framed, power run to the corner.
  4. Days two and three Rails and cab set, trim fitted, the lift tested.
  5. Handover State inspection, then the owner learns the power-loss lowering.

Planning right

  • Check what sits above the corner first. A bathroom or a beam overhead moves the lift.
  • This cab fits one person standing. If a walker has to ride too, we size a larger one.
  • Keep the space under the lift clear. It stops if anything is in its way.
  • We tell you how routine service is booked and who comes out if it stops.

Get a free quoteMore about shaftless home elevators

Elevator in closets the builder framed for a future elevator

Example project

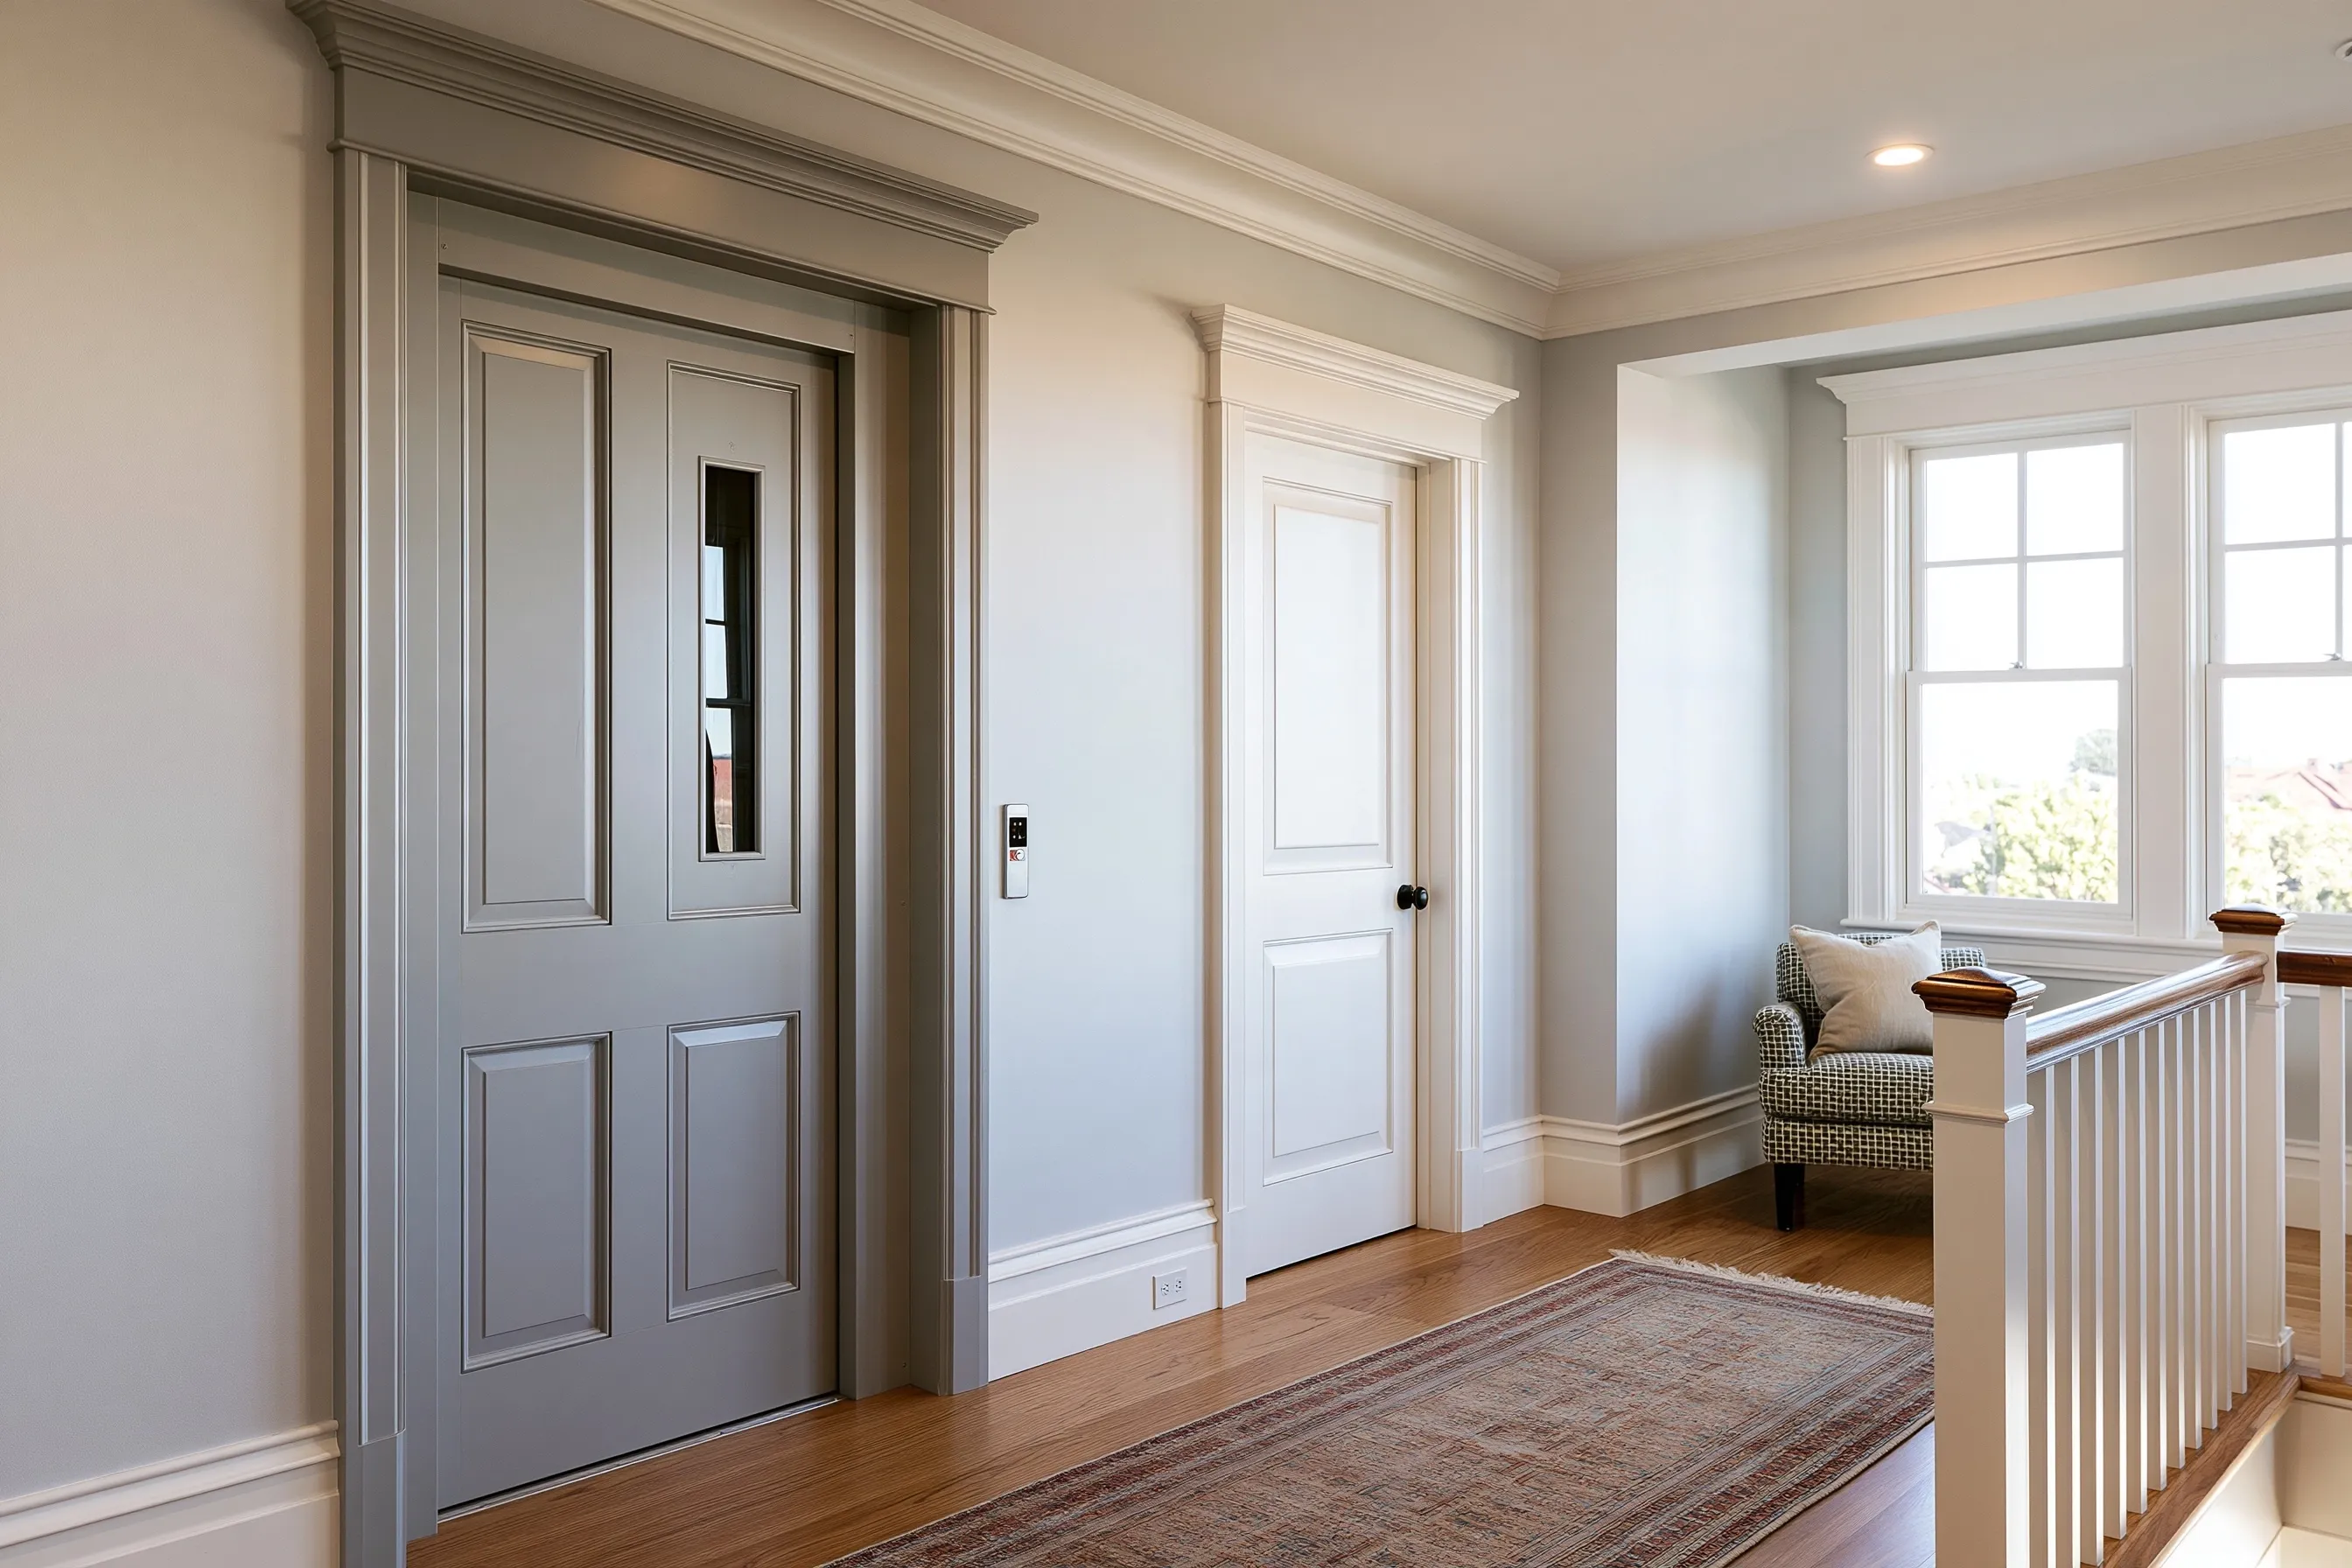
Upstairs hallway with a closed painted elevator door with a narrow window, a call button beside it, an oak floor and a runner rug
Home
2000s Auburn home with two floors and about 2,600 sq ft of living space
Original request
Finish the elevator the house was built ready for
Shaft
Two closets stacked one above the other, framed to shaft size with a shallow pit and power left in place
Elevator
Enclosed elevator, two stops, standard cab
Doors
A painted door with a narrow window at each floor
Timeline
Shelves out and the shaft checked in a day; elevator installed in about a week and a half
Cost
$48,000

Scope of work

Closet shelves and doors removed, the framed shaft, pit and power checked against the elevator drawings, the cab, rails, drive, doors at both floors, controls, hookup, trim and paint, testing and the state elevator permit and inspection.

Project overview

In this example, the builder of a 2000s house in Auburn framed two stacked closets to the size of an elevator shaft, with a shallow pit and power left in place. For years they were just closets. Now one of the owners has back trouble and the couple want the elevator.

Because the shaft is already there, most of the work is the elevator itself. We still measure the shaft against the chosen model before ordering, because a shaft framed years ago may not match today’s drawings.

The goal

A working elevator in the space the house was built to give it, with little building work.

Process

  1. First visit Closets opened, shaft size, pit depth and power checked against the model’s drawings.
  2. Order and permit Elevator ordered; permit filed with Washington L&I. Making the elevator takes most of the wait.
  3. Install Rails, cab, drive and both doors set in about a week and a half.
  4. Finish Trim and paint around the doors, then testing and the state inspection.
  5. Handover Controls, the phone in the cab and the power-loss procedure explained.

Planning right

  • If your house has stacked closets marked as a future elevator, we measure them before you pick a model.
  • A shaft framed long ago may need small changes. They go in the quote, not after the order.
  • Keep anything stored in those closets out until the shaft has been checked.
  • A home elevator in Washington needs no yearly state inspection unless you ask for one. Plan routine service anyway.

Get a free quoteMore about enclosed home elevators

Elevator added through hall closets in a 1940s house

Example project

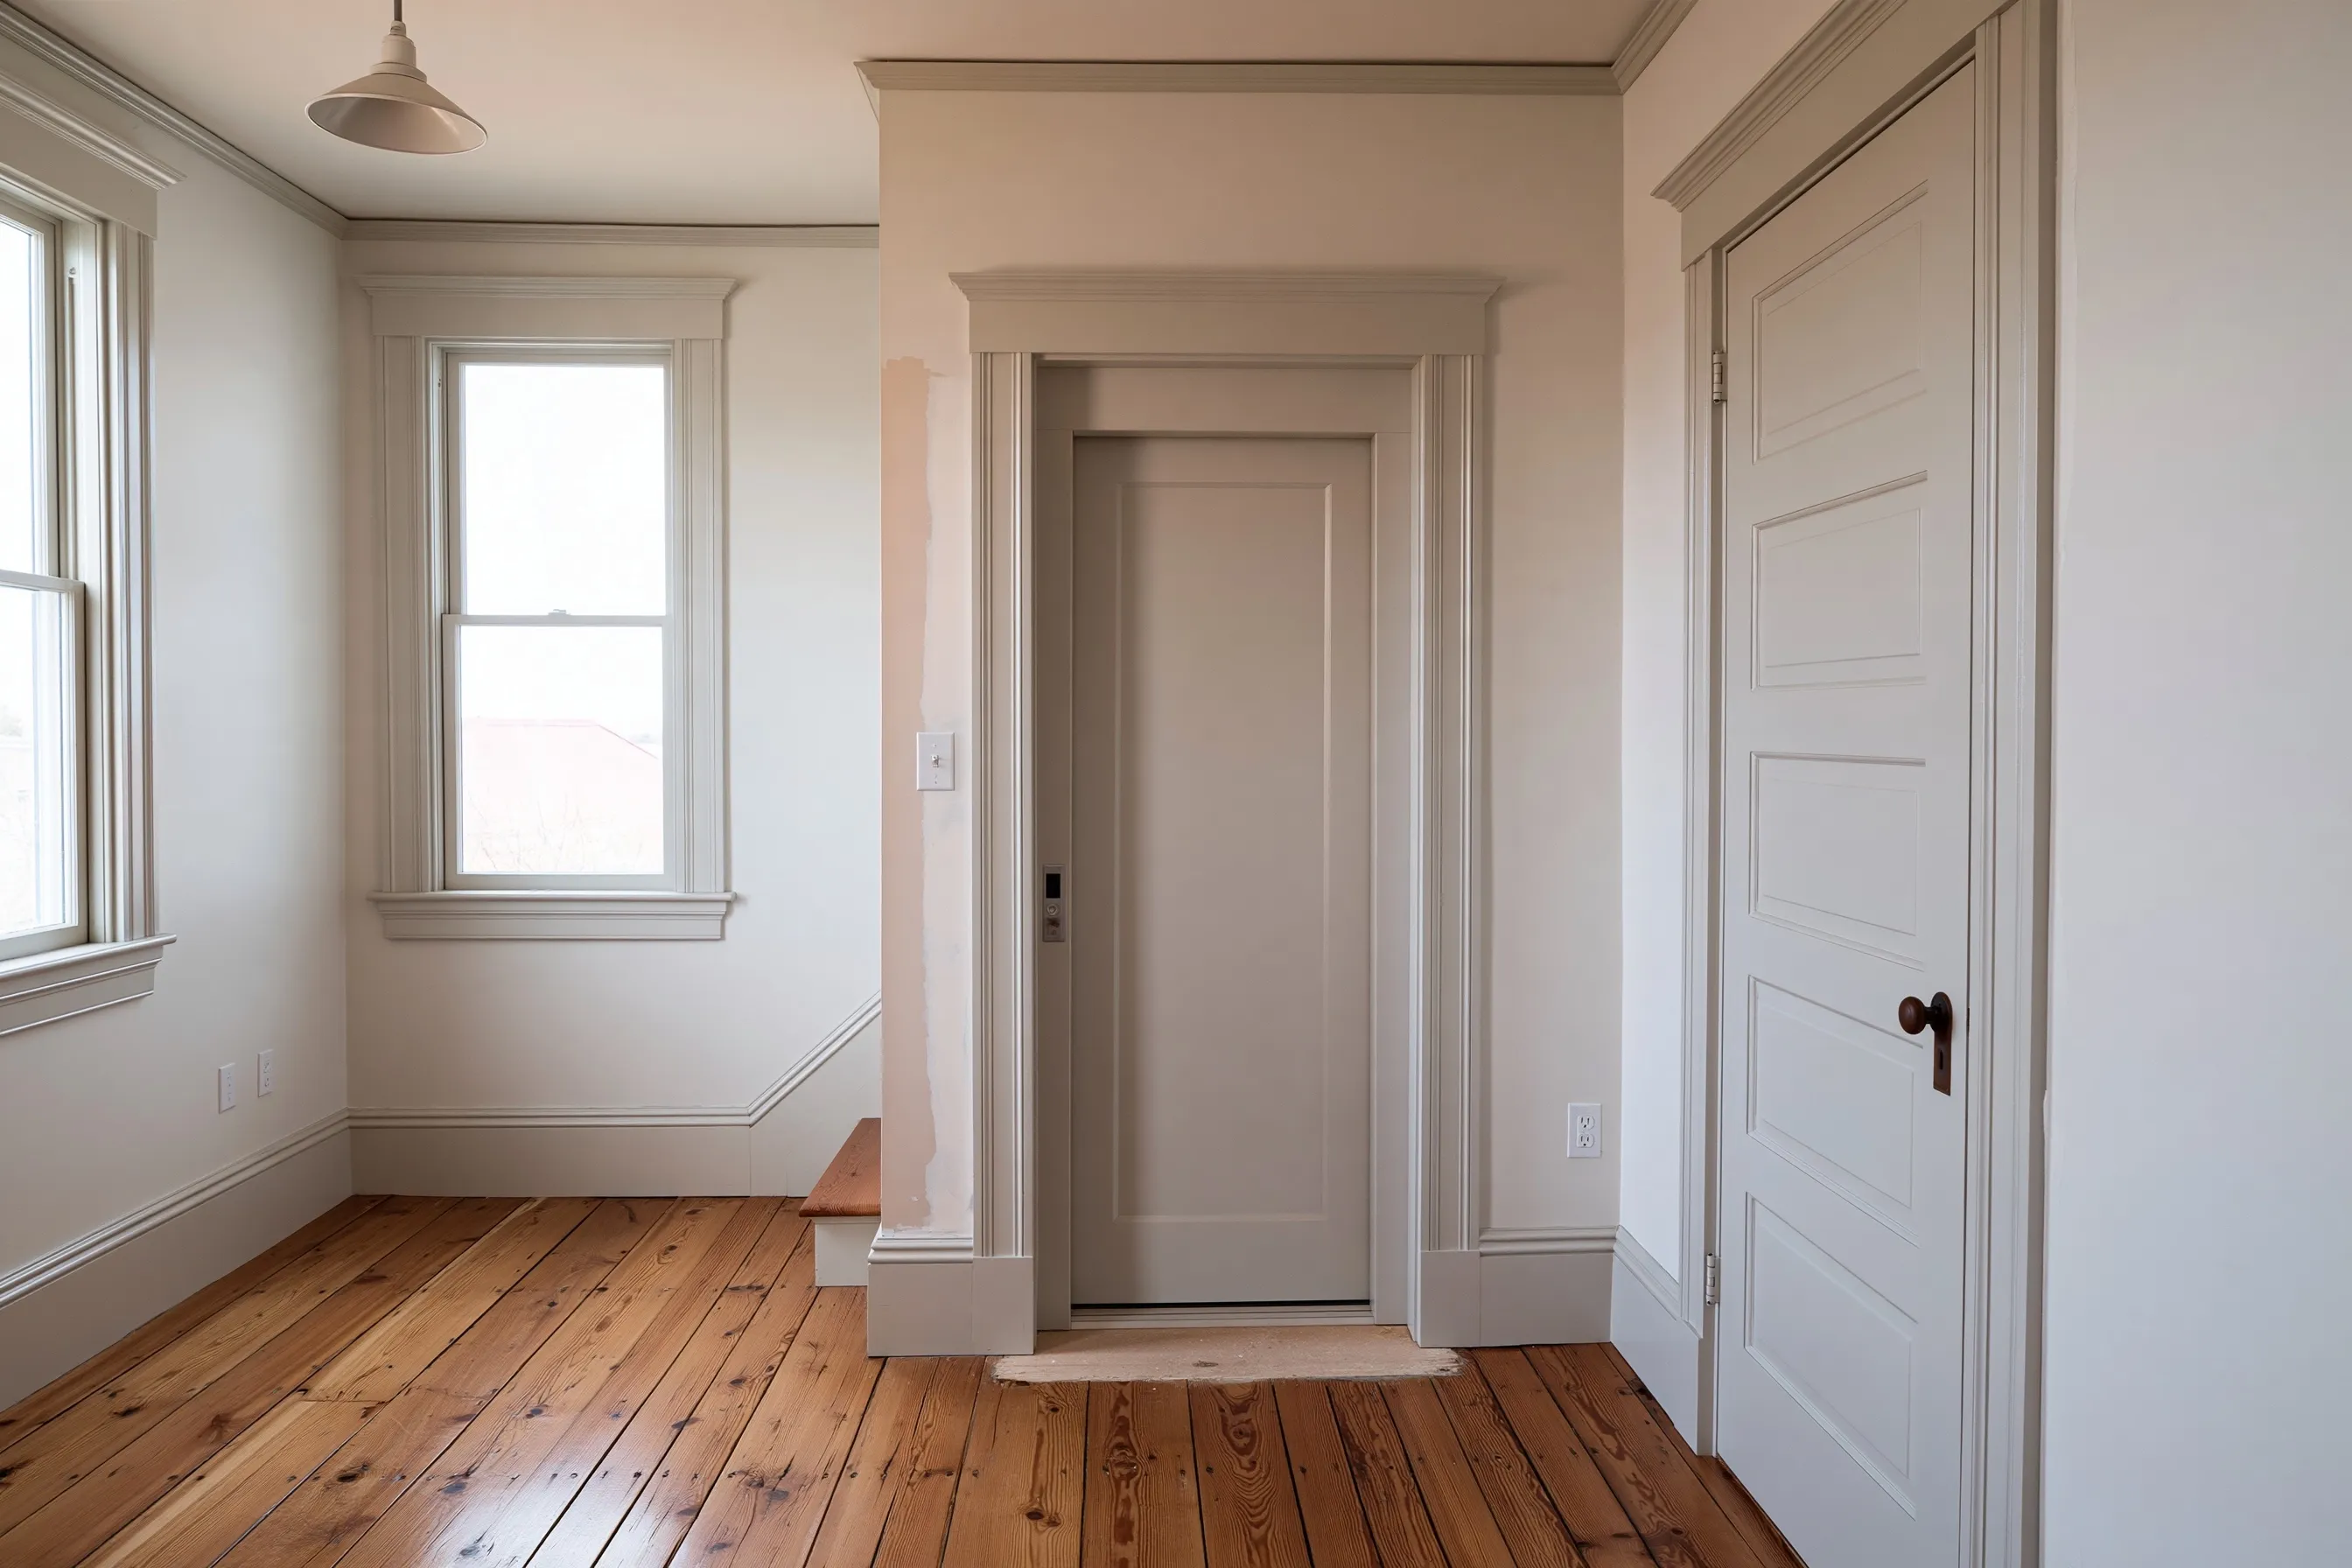
Upstairs hallway of an older house with a new elevator door set into the wall, trim matched to the old painted trim, fir floor
Home
1940s two-story house in Auburn with painted trim and fir floors, about 2,000 sq ft
Original request
Stay in the house as the stairs get harder for both owners
Shaft
Built through a hall closet downstairs and the one above it upstairs
Elevator
Enclosed elevator, two stops, standard cab
Building work
Two floor openings, a new header, a power circuit, drywall, trim matched to the old trim, paint
Timeline
About three weeks of building work, then about a week and a half for the elevator
Cost
$72,000

Scope of work

Drawings, the closets taken out, floor openings cut and framed, a new header, the shaft framed and drywalled, a power circuit, the elevator with doors at both floors, trim matched to the house, patching and paint, testing and the state elevator permit and inspection. A city building permit fee for the structural work is extra.

Project overview

In this example, the owners of a 1940s house in Auburn want to stay as they get older. Their bedroom is upstairs, and two hall closets happen to line up, one above the other.

Those closets become the shaft. The floor between them is opened, a header carries the load, and the shaft is framed and lined with drywall. The new elevator doors get casing to match the house’s old painted trim, so the door looks like it has always been there.

The goal

An elevator that looks like part of the house and lets the owners keep living on both floors.

Process

  1. First visit Closets measured, the floor framing checked from below, and the power panel looked at.
  2. Drawings and permits Shaft drawings, a city building permit for the structure and the state elevator permit.
  3. Weeks one to three Closets out, floor opened and framed, shaft built and drywalled, circuit run.
  4. Week four Elevator installed over about a week and a half.
  5. Finish Trim and paint, testing, the state inspection and a walk-through of the controls.

Planning right

  • Closets that line up are the easiest place for a shaft. Check what is above and below them first.
  • Expect some dust and noise while the floor is opened. The rest of the house stays usable.
  • Patching and paint are part of the price in this example.
  • Save some of the old trim if you can. It makes the new door blend in.

Get a free quoteMore about adding an elevator to an existing home

Elevator in a new tower beside a split-level entry

Example project

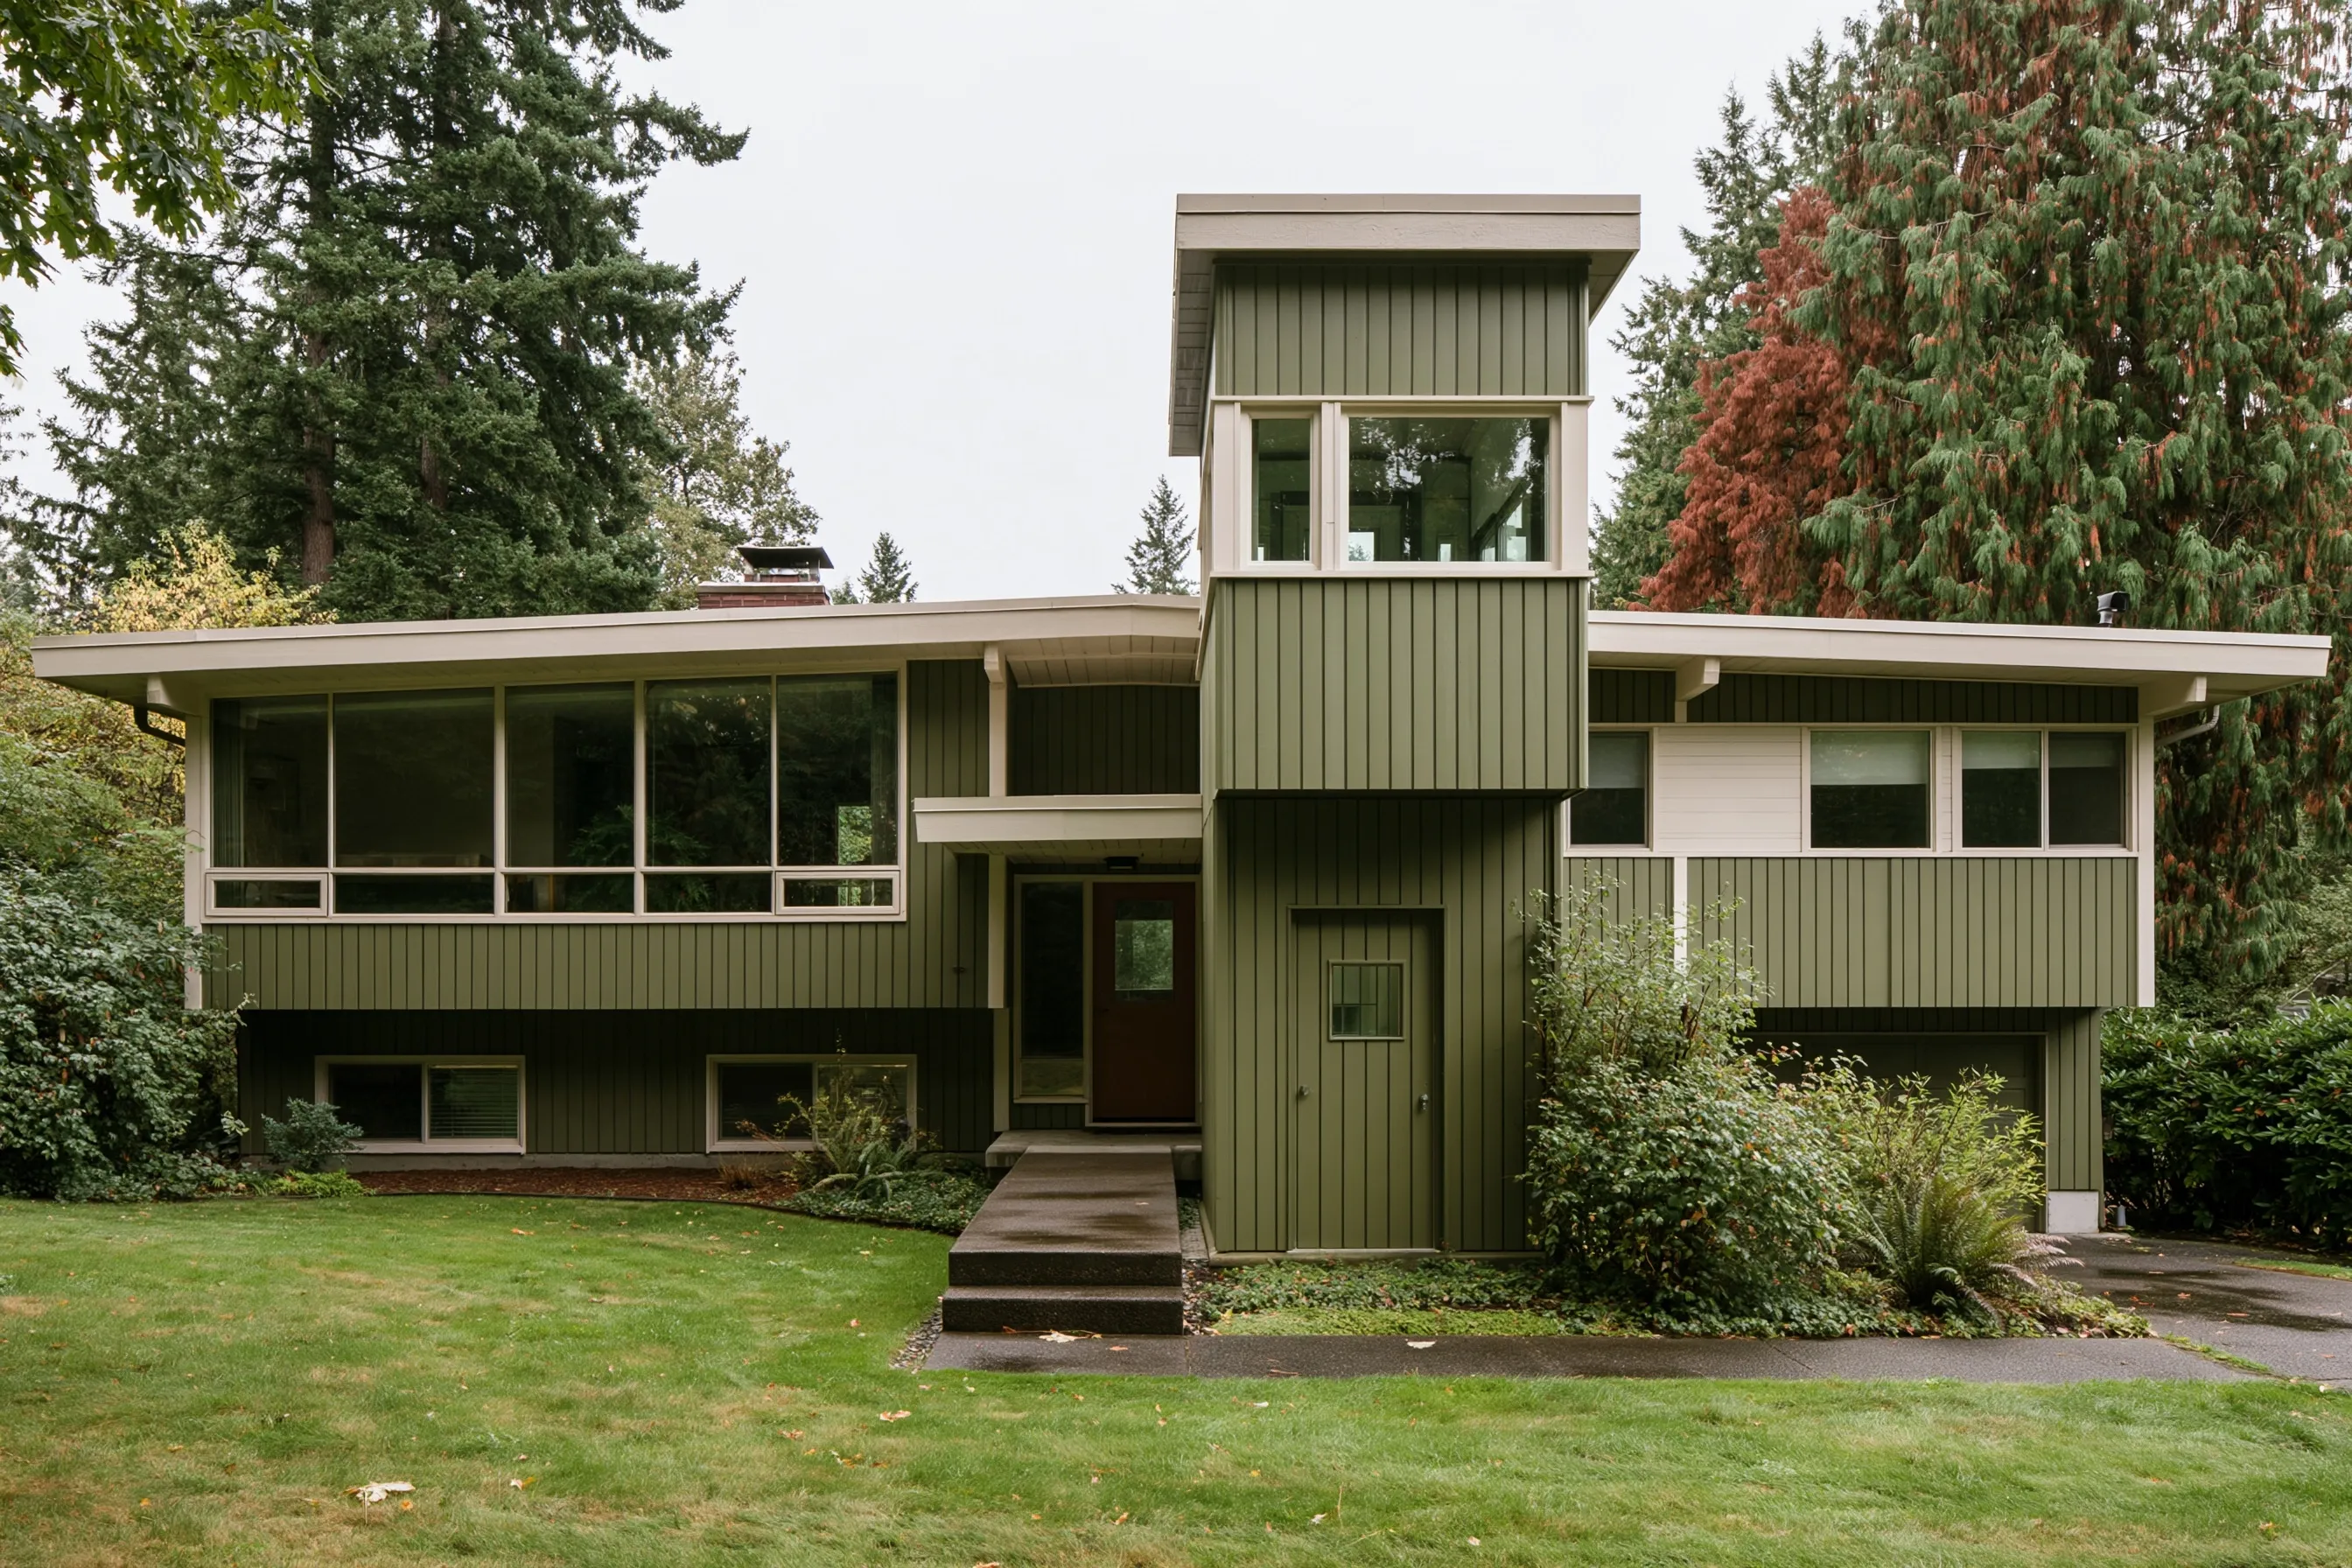
1970s split-level house with vertical board siding and a narrow two-story tower in matching siding beside the front entry, a concrete walk leading to it
Home
1970s split-level house in Sumner
Original request
An elevator, with no room for a shaft inside
Tower
A narrow two-story tower beside the front entry, sided to match; designed and built by the owners’ builder
Elevator
Enclosed elevator in the tower, two stops: the front walk level and the upper living floor
Timeline
Tower first; elevator installed in about a week and a half once the tower is closed in
Estimated elevator cost
$54,000

Scope of work

The elevator set in the finished tower shaft: cab, rails, drive, doors at both stops, controls, hookup, testing and the state elevator permit and inspection. The tower itself is designed and priced separately with the builder.

Project overview

In this example, the owners of a 1970s split-level house in Sumner want an elevator, but every floor of the house is short stairs and small rooms. There is no spot inside where a shaft fits without losing a bedroom.

Instead, the owners’ builder adds a narrow tower beside the front entry, sided and painted to match. The elevator inside it stops at the front walk level and at the upper floor with the kitchen and bedrooms. The tower is its own design and its own price; this example covers the elevator that goes in it.

The goal

An elevator that reaches the main living floor without giving up a room inside the house.

Process

  1. First visit Inside layout checked; the outside spot measured with the builder.
  2. Design Elevator drawings given to the builder so the tower matches the shaft size, pit and power.
  3. Permits City permit for the tower through the builder; elevator permit with Washington L&I.
  4. Install Once the tower is closed in, the elevator goes in over about a week and a half.
  5. Handover Testing, the state inspection and a walk-through of the controls.

Planning right

  • Bring the elevator drawings to the builder before the tower is designed. The tower has to fit them.
  • Check the city’s setbacks early for an addition near the front of the lot.
  • A tower needs heat in winter like the rest of the house. Plan that with the builder.
  • The tower and the elevator are priced separately, so you can compare each one.

Get a free quoteMore about enclosed home elevators

Three-stop elevator for a daylight lower-level suite

Example project

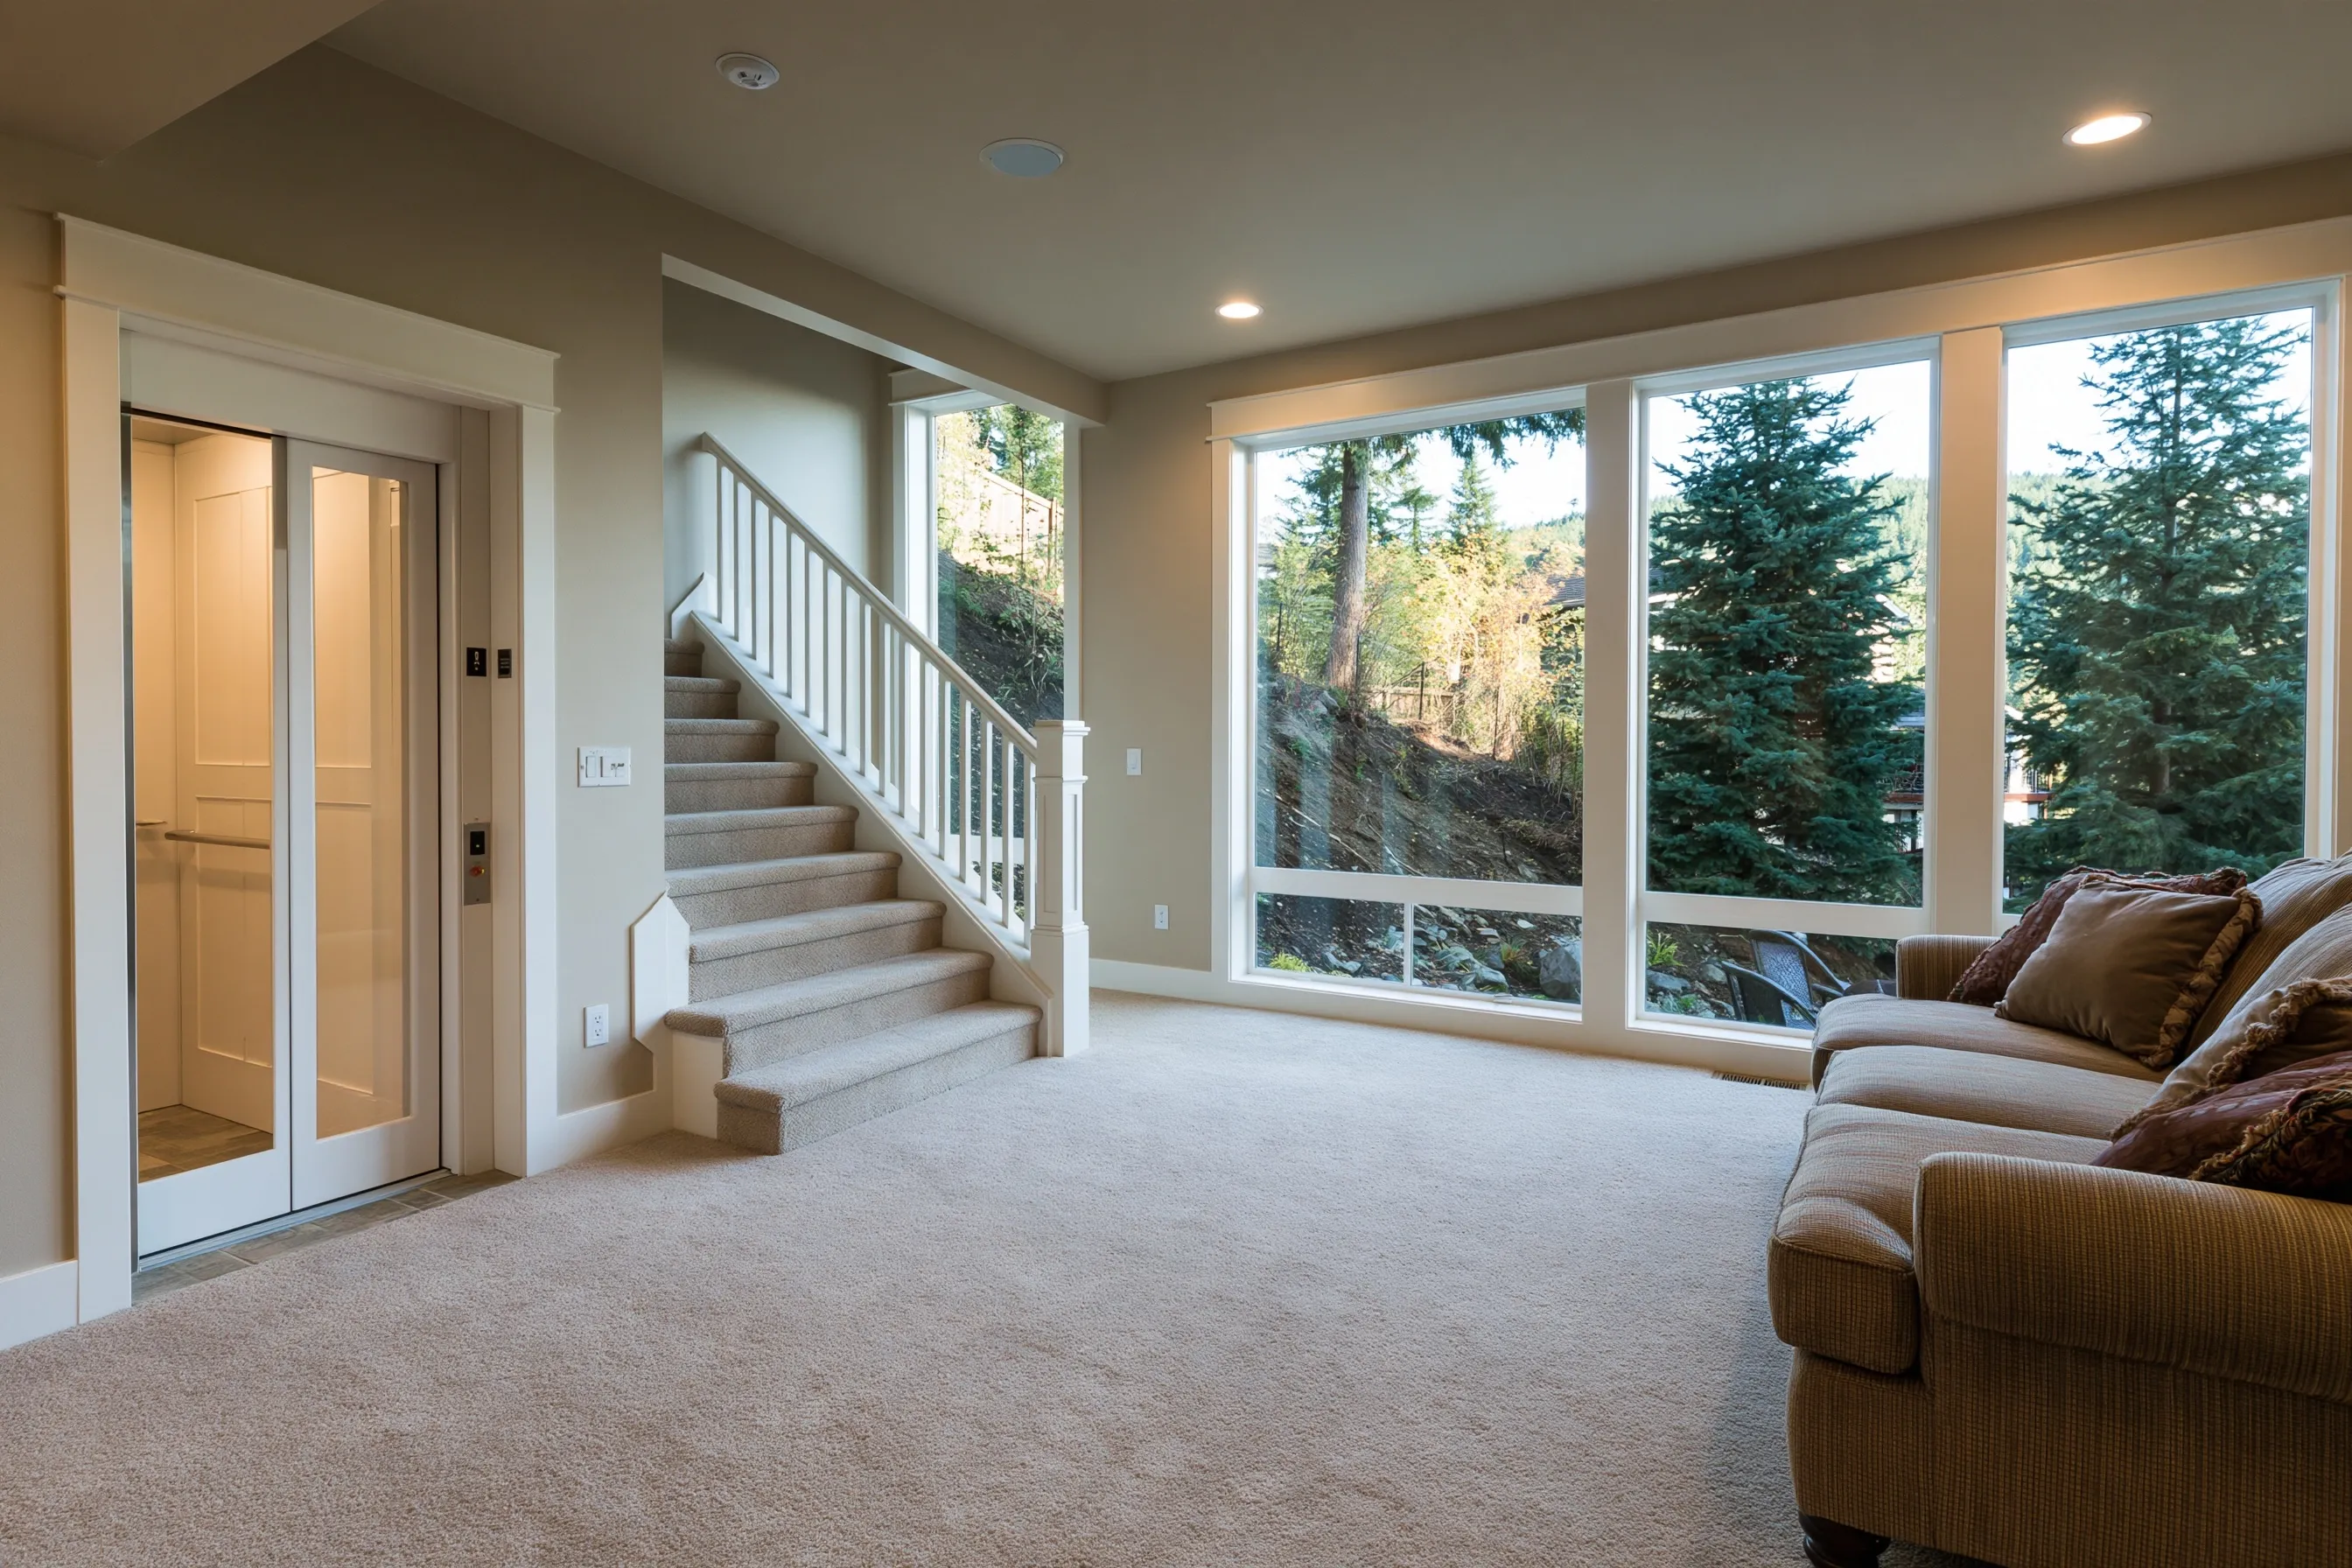
Finished lower-level family room with a sofa, an elevator door in the wall beside the stair and large windows to a sloping yard with evergreens
Home
1980s three-level house on a hillside lot in Bonney Lake, about 3,000 sq ft
Original request
A way for a parent moving into the lower level to reach the kitchen and the family upstairs
Floors
Daylight lower level, main floor, bedrooms upstairs
Shaft
Built beside the stair, through a storage room, a pantry and a linen closet
Elevator
Enclosed elevator, three stops, standard cab
Timeline
About four weeks of building work, then about two weeks for the elevator
Cost
$95,000

Scope of work

Drawings and engineering, three floor openings, structural framing, the shaft framed and drywalled, a power circuit, the elevator with doors at three floors, patching and paint, testing and the state elevator permit and inspection. City building permit and engineering fees are extra.

Project overview

In this example, the owners of a 1980s hillside house in Bonney Lake are turning the daylight lower level into a suite for a parent who is moving in. The stairs between the three levels are the problem.

A storage room on the lower level, the pantry above it and a linen closet on the top floor line up beside the stair, so the shaft goes there. The elevator stops at all three floors, so the parent can reach the kitchen and the bedrooms as easily as the suite.

The goal

A lower-level suite that is part of the house, with every floor in reach by elevator.

Process

  1. First visit All three floors measured, the stacked rooms found, framing and power checked.
  2. Drawings and permits Engineering for three floor openings, a city building permit and the state elevator permit.
  3. Weeks one to four Rooms opened, floors framed, shaft built and drywalled, circuit run.
  4. Weeks five and six Elevator installed with doors at all three floors.
  5. Finish Patching and paint, testing, the state inspection and a ride-through with the family.

Planning right

  • Three stops cost more than two, but skipping a floor can leave the most used room out of reach.
  • Hillside lots can mean a deeper pit or rock under the lower level. We check for that early.
  • Plan the suite and the elevator together so doors and furniture do not block the landing.
  • Show the whole family the power-loss procedure, not only the main rider.

Get a free quoteMore about adding an elevator to an existing home

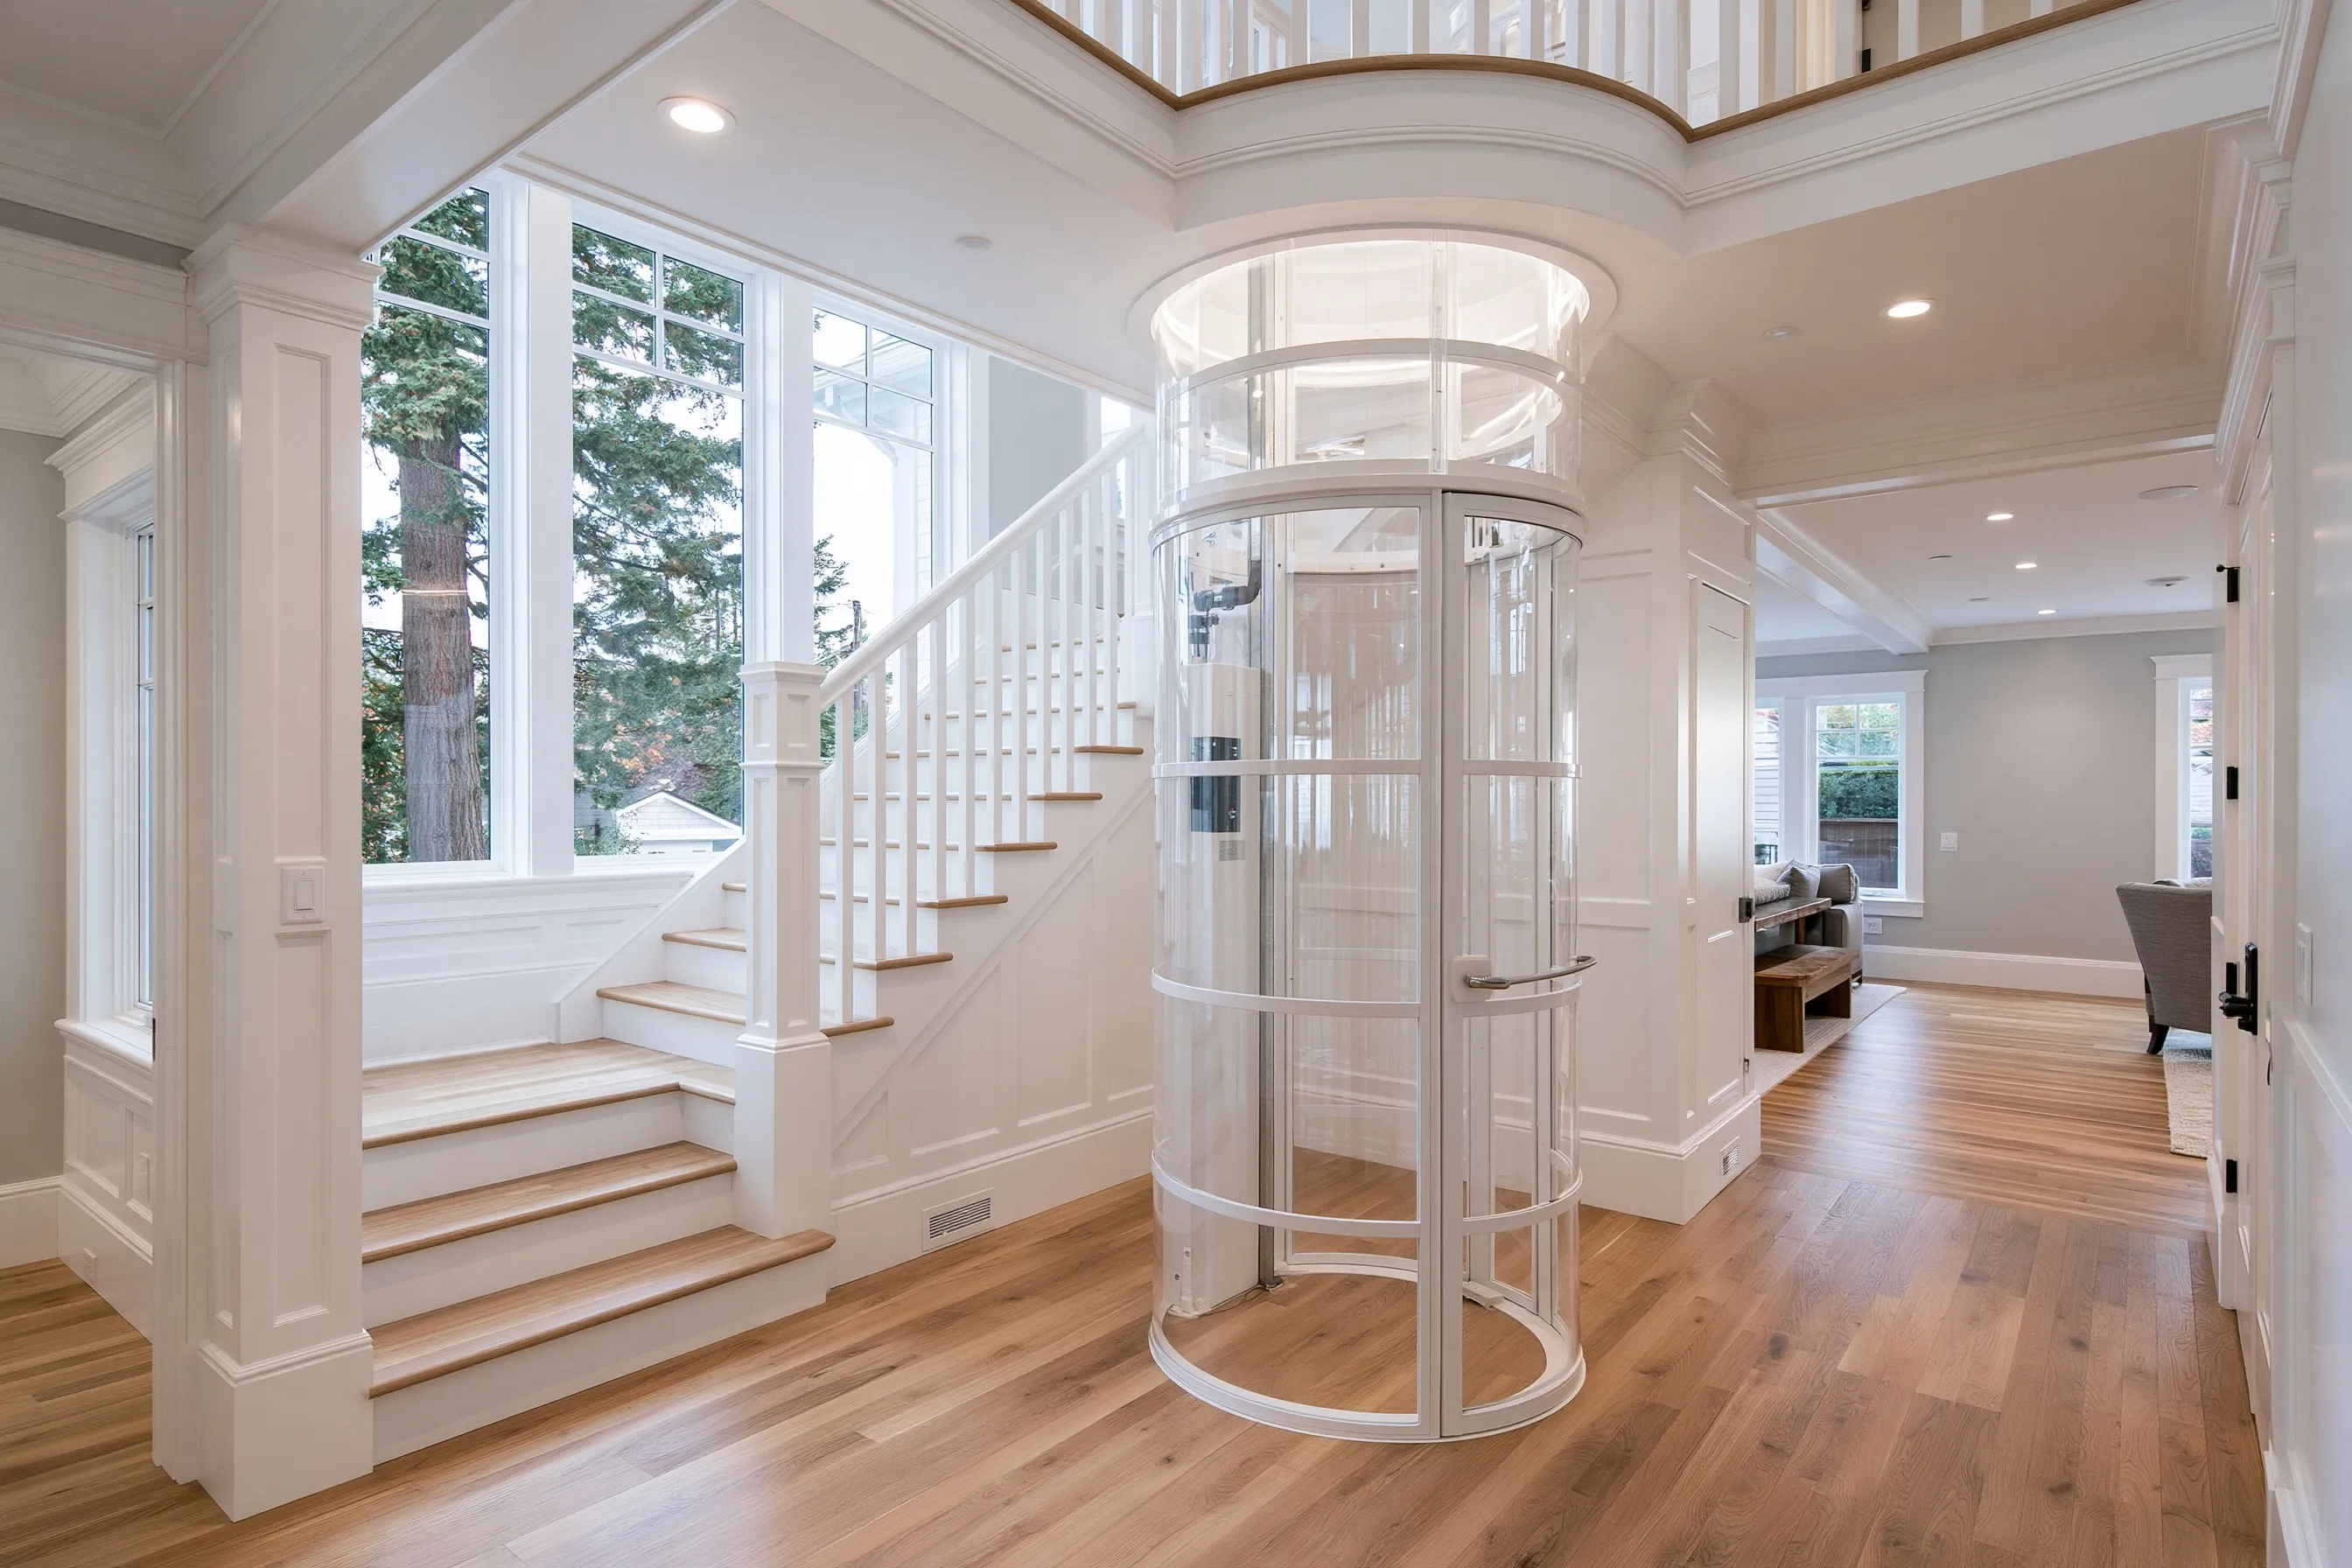
Round see-through elevator beside the stair in a 2010s house

Example project

Narrow round see-through elevator beside the open stair of a bright entry hall, rising through a round opening to the upstairs landing
Home
Auburn house from the 2010s with an open entry and stair
Original request
An elevator that does not close off the open stair area
Elevator
Round see-through vacuum elevator for one rider, two floors
Spot
Beside the stair, rising through a round opening into the upstairs landing
Building work
One floor opening, a power circuit and trim at both floors
Timeline
Two to three days to install once the opening and power are ready
Cost
$50,000

Scope of work

The elevator, a round floor opening cut and framed, a power circuit, trim at both floors, testing and the state elevator permit and inspection.

Project overview

In this example, the owners of a 2010s house in Auburn want an elevator next to their open stair, but a closed shaft would block the light and the view across the entry. A round vacuum elevator is clear on all sides.

It is a tube about the width of a small closet, moved by air pressure, and it fits in a small corner beside the stair. It carries one rider, which suits this couple, since only one of them needs it.

The goal

A light, open elevator that keeps the stair area bright.

Process

  1. First visit Stair area measured and the framing above the chosen spot checked.
  2. Permit Elevator permit filed with Washington L&I.
  3. Prep Round floor opening cut and framed, power run to the spot.
  4. Install Tube and cab set in two to three days, then trim fitted.
  5. Handover Testing, then the state inspection.

Planning right

  • A one-rider tube is narrow. Check that the rider can turn and reach the controls easily.
  • Vacuum elevators make more noise than enclosed ones. Hear one running before you choose.
  • We give you the clear inside size and the weight limit for the model, not just the outside size.
  • Check the ceiling height upstairs. The top of the tube needs room above the landing.

Get a free quoteMore about glass home elevators

Request a free home elevator quote

Tell us how many floors the elevator should reach, who will ride it, whether you have closets that line up or a spot in mind and where the house is. We'll get back to you soon with an estimate or any questions we have. Estimates are free and there's no obligation.

Call (253) 296-2414

Call (253) 296-2414